How to make grounding
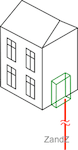
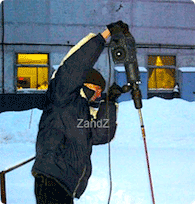
How to make quick grounding with the resistance of 4 ohms at a number of facilities (cross-connecting equipment), located in restrained urban conditions? Soil is - clay loam / clay with resistivity of 80 ohm*m. In view of the desired density and undesirability of holding digging works outside of the facility - it was decided to hold the construction of the required protective grounding in the immediate vicinity of the building, and also directly under the cabinet, where the equipment is located.
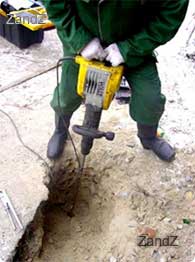
Coming out of the soil resistance, single protective grounding consisted of one electrode 30 m long of modular grounding as a ready grounding kit ZZ-000-030.
The estimated resistance of protective grounding was 3.8 Ohm (grounding calculation).
After mounting of a test electrode of protective grounding, the measured resistance turned out to be 1.4 Ohm, which can be associated with a soil resistivity different from the calculated one (about 30 ohm * m).
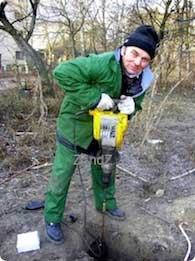
The following protective ground conductors were mounted on the basis of initially recieved datas - their depth was 9 meters. Their average grounding resistance was 3.5 Ohm (from 3 to 4 ohms).
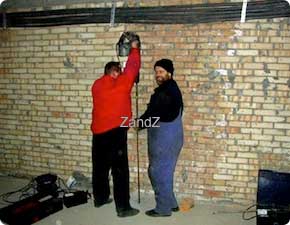
5 hours and the resources of two people were spent on the installation of one protective grounding (10 man-hours).
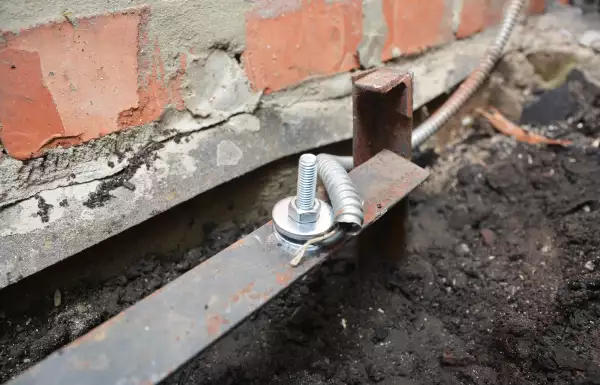
A copper cable with cross section of 16 mm2 was used to connect the protective grounding with the object. Connection of the protective ground conductor and the cable was carried out with clamps, contained in the grounding kit.
How to make a multi-electrode grounding on mobile communication facility.
How to make grouding for communication equipment with grounding resistance of 2 Ohm? Soil is a mixture of clay and sand with a resistivity of 130 ohm * m. Due to undesirability of holding digging works outside the building - it was decided to hold the construction of protective grounding in the basement of the building.
Coming out of the general requirements and soil resistance, protective grounding consisted of six 15-meter electrodes of modular grounding in the form of ready-made grounding kits ZZ-000-015 located at the distance of 15 meters from each other.
The estimated resistance of protective grounding was 1.9 Ohm (grounding calculation).
After mounting of a protective grounding, the measured resistance turned out to be 1.1 Ohm, which can be associated with a soil resistivity different from the calculated one (about 75 ohm*m).
16 hours and the resources of two people (32 person-hours) were spent on the installation of protective grounding electrode (without burying of the grounding conductor and its connection).
To connect the protective grounding electrodes a steel strip 4*40mm (section 160 mm2) was used. Connection of protective grounding electrode and the steel band was performed with clamps, included in the grounding kit.
Grounding in winter time in complicated ground
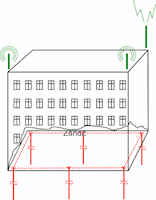
How to create a grounding device with 4 ohm resistance in winter at the site where the soil depth does not allow deep-seated ground conductors? Soil is a mixture of clay and sand with a resistivity of 160 ohm*m, and 4 meters deep - limestone.
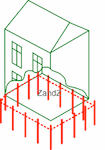
Coming out of soil resistivity and its character, protective grounding consisted of 14 3-meter electrodes of modular grounding as a ready grounding kit ZZ-000-045 placed along the contour of the building (closed loop). The distance between the earth electrodes was 3 meters.
The estimated resistance of protective grounding was 3.95 Ohm (grounding calculation).
Using electrodes of ordinary black steel was undesirable because of winter conditions (frozen ground makes penetration of steel parts impossible) and the remoteness of the object from the nearest settlement (required a reliable protective grounding with a lifetime of at least 15 years in order to reduce maintenance and reconstruction costs).
After installation, the measured resistance turned out to be 3.9 Ohm, which confirmed the calculated data. It should be remembered that from spring to autumn this protective grounding will have resistance less than the value measured in winter due to defrosting of the upper soil layer.
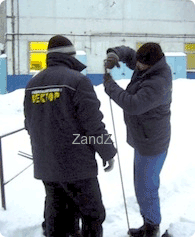
10 hours and the resources of one person (10 person-hours) were spent on the installation of protective grounding electrodes (without burying of the grounding conductor and its connection).
To connect the protective grounding electrodes a steel strip 4*40mm (section 160 mm2), laida in pre-dug channel 0.5 meters deep, was used. Connection of the protective grounding electrode and the steel band was performed with clamps, contained in the grounding kit.
How to make house grounding
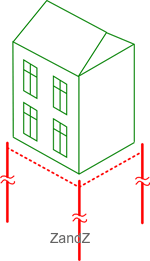
There is a very simple and easy-to-implement solution how to create a good and reliable grounding in a single-family house it guarantees the result for a hundred years. It is installation with ready-made, quickly assembled kits of house grounding.
Installed in one day, by one person, without welding - for 100 years!
More about this on the page "House grounding".
Related Articles:
 Grounding in the cellar of the single-family house - is it possible?
 Why Cannot Vertical Earthing Devices Be Installed Close to Each Other?
 Electrolytic Grounding in Permafrost Soils: Should Vertical of Horizontal Electrodes Be Used?
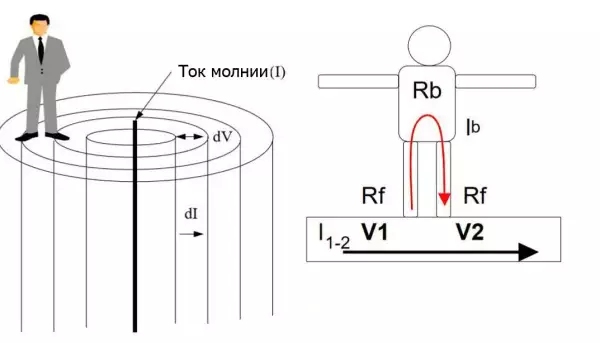 Step Voltage: Dangerous Obscurity and Reliable Protection
 Nature of Electrochemical Corrosion
 Public Safety in Land Transport in case of Direct Lightning Strike