(held on August 22, 2018 at 11:00 Moscow time)
1080p full screen watching is recommended.
The webinar plan:
- describing the principle of work with specifications;
- creating and editing a specification by category;
- creating parameters and calculated values in specifications;
- stylizing specifications.
Webinar text. Page 1
Approximate reading time: 40 minutes.

Introduction to BIM
Ведение в концепцию BIM
ZANDZ.ru, март 2018
Introduction to BIM
ZANDZ.ru, March 2018
We are glad to greet you in our webinar titled “BIM Design in Revit. Handling Bill of Quantities and Specifications”. The speaker is Stanislav Vozchikov, the BIM modelling specialist and the certified Autodesk Revit Professional specialist. Today, it is our sixth webinar of the series titled “BIM Design: From Fundamentals to Practice”. Let me remind you that the next webinar of this series will be held on September 19. Moreover, on September 5, we will have the next webinar with professor Eduard Meerovich Bazelyan. This webinar series is based upon his new book to be published soon. The webinar subject is “Electromagnetic Compatibility with Lightning. When and What SDPs Should We Install?” I will send a link to the soonest ZANDZ webinars in the chat. Please follow it, if you have not registered yet. You can get information about our new events on the website and in our social media groups. I will also send the links to the chat. Our main groups are in Vkontakte and Facebook. The links are available in the chat. Join the social media groups or register at the website. Do not miss the relevant events. Let me tell you a little bit about the organizational aspects. Today, the webinar will take 60 minutes. We will answer your questions during the webinar in the chat and then additionally at the end of the webinar, if it is needed. And I want to answer a frequently asked question: the webinar record will be available. It is usually published within two or three days on the website, and after that we send links to it to e-mails of the participants who have registered for the webinar. Please write your questions in the “Questions” tab; it is more convenient to read and promptly answer them. I urge you to be active, ask your questions, and leave comments in the chat.
Plan
План
описание принципа работы со спецификациями;
создание и редактирование спецификации по категории;
создание параметров и расчетных значений в спецификациях;
оформление спецификаций
Plan
describe the principles of work with specifications;
creating and editing specifications by category;
creating parameters and calculated values in specifications;
stylizing specifications
Today, we will study a very important and interesting subject: "Handling Bills of Quantities and Specifications in Revit".
– What is the plan for our today's webinar? First, we will study the description of the principles of work with specifications, then we will create and edit the specification for a category in Revit, and then we will look into the specification settings and creation of calculated values for specifications, parameters, etc. And finally, we will make the specification, place it on a sheet, i.e. go through the entire process from creating to placing on the drawing. The Revit specifications have several specific features you need to know before creating a specification. What is a specification in Revit?

Specific features of specifications
Особенности спецификаций
Спецификация - это таблица, в которой содержатся данные, извлеченные из свойств элементов проекта.
В спецификацию нельзя занести элемент, которого не существует в проекте.
Создавать спецификации можно в любой момент, по мере необходимости.
Если в проект вносятся изменения, затрагивающие данные в спецификации, спецификация автоматически обновляется.
Specific features of specifications
Specification is a table containing data retrieved from the properties of the project elements.
You cannot add an element into the specification, which is not present in the project.
You can create specifications at any point, when you need them.
If any changes are made to the project, which are associated with the specification data, then the specification is automatically updated.
Specification is a table containing the data retrieved from the properties of the project elements. In general, as I have already mentioned, the Revit model is a database. So, this database may be provided in a tabular form, which is the specification. It is a table obtained from the model, all elements of it are represented in a structure, in a tabular form. There are several specific features of specifications you need to know. The first is that you cannot simply add any elements into the specification. You cannot create a string where you enter some data. The data are provided in the specification only when you add an element into the model. You cannot do that another way. You cannot do it like in AutoCAD by adding one string or like in Excel by entering everything you want. It does not work like this. The specification is created only from the model elements. You can create specifications any time you need them. What does it mean? It means that you can create specifications even when your project model is empty yet. It means that you can create a specification in advance, enter particular items, more specifically, particular columns with parameters, e.g., element names, element number, notes, comments, etc. And then, when you create models, this specification will be populated automatically.
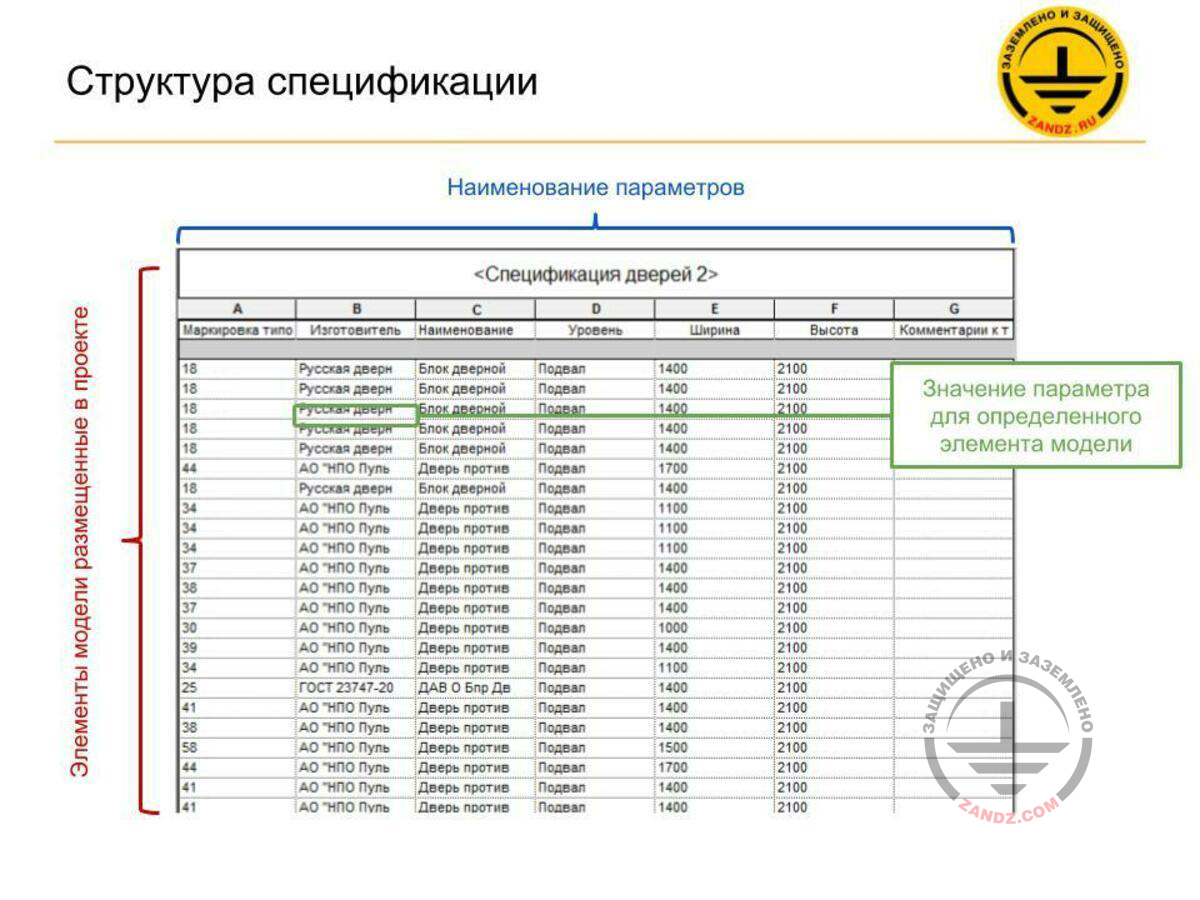
Specification structure
Структура спецификации
Наименование параметров
Элементы модели размещенные в проекте
Значение параметра для определенного элемента модели
Specification structure
Parameter name
Model elements in the project
Parameter value for a particular model element
The specification is generated in a simple way. This is a table containing the respective columns, rows, and cells containing some data. How is it generated? The entire table can be understood as follow: each string in the specification is a separate element. For example, a specification for the doors is provided. Each door is represented by a separate string. In the beginning, it is the first, the second, the third, and the fourth. They may have the same data set, but it is each instance separately. You may view “Model Elements in the Project” here. In the columns, we have parameter names for these doors. These are marks, manufacturer, name, level, e.g., where the door is located, width, height of the box, and some comments that may be added. The parameters may be filled in or may not be filled in. For example, these are the empty strings in the comments. And the cell. Each cell is a parameter value for a certain element. It means that we have a door marked "44"; this is one door instance. And it has particular parameter values. The parameters are read from the top by column names, while the parameter values for certain instances are in the cells. This is the main principle for creating specifications, its structure. If you understand it, then it is easier to understand how it happens and how the specifications are generated. Let's look at the sample project to learn how it is generated.
Specification generating
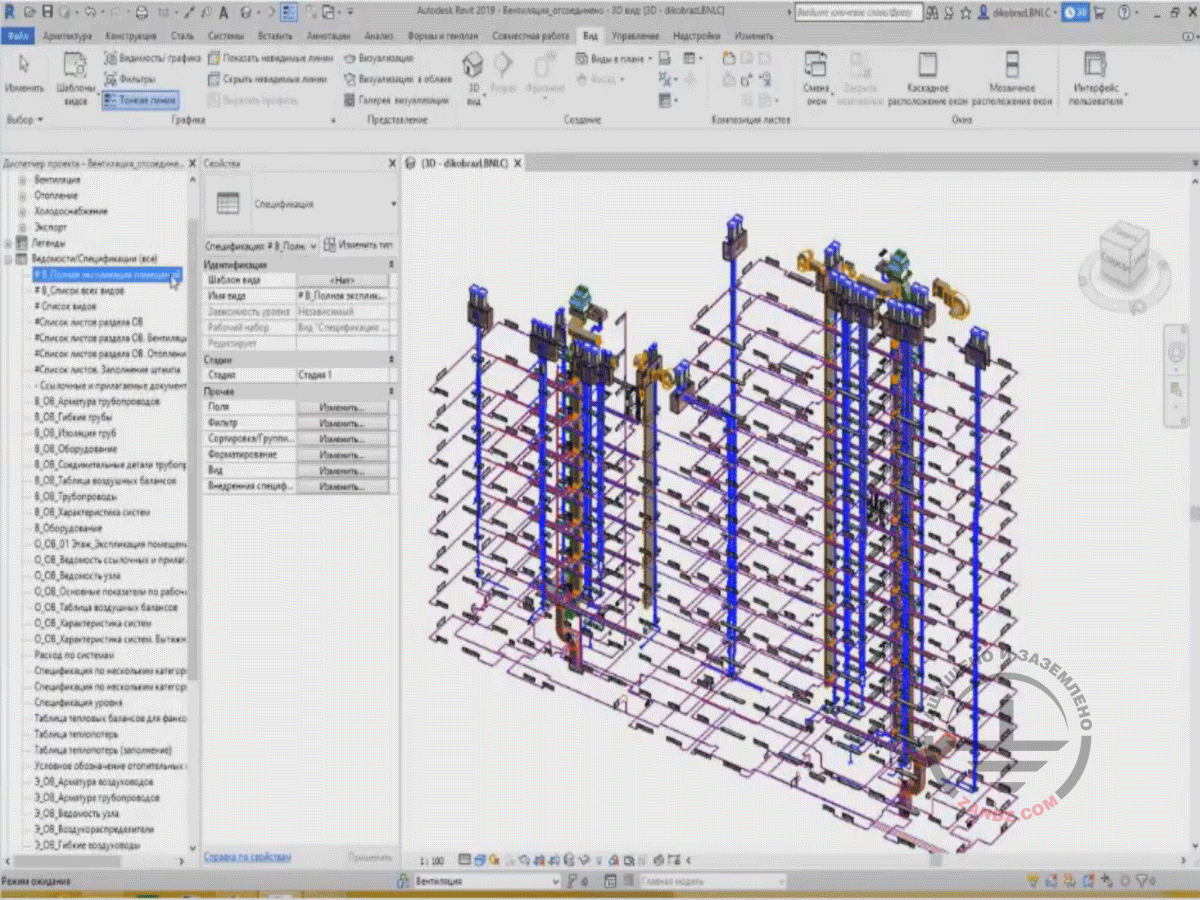
And now I have provided a project for heating and ventilation. Based on it, we will learn and study specifications. First: in the Project Browser, there is a separate tab “Bills of Quantities (Specifications)”, which, when you unfold the list, may contain some previously created specifications that are present in the project. They are provided as a long list.
"Project Browser". "Bills of Quantities (Specifications)" tab.
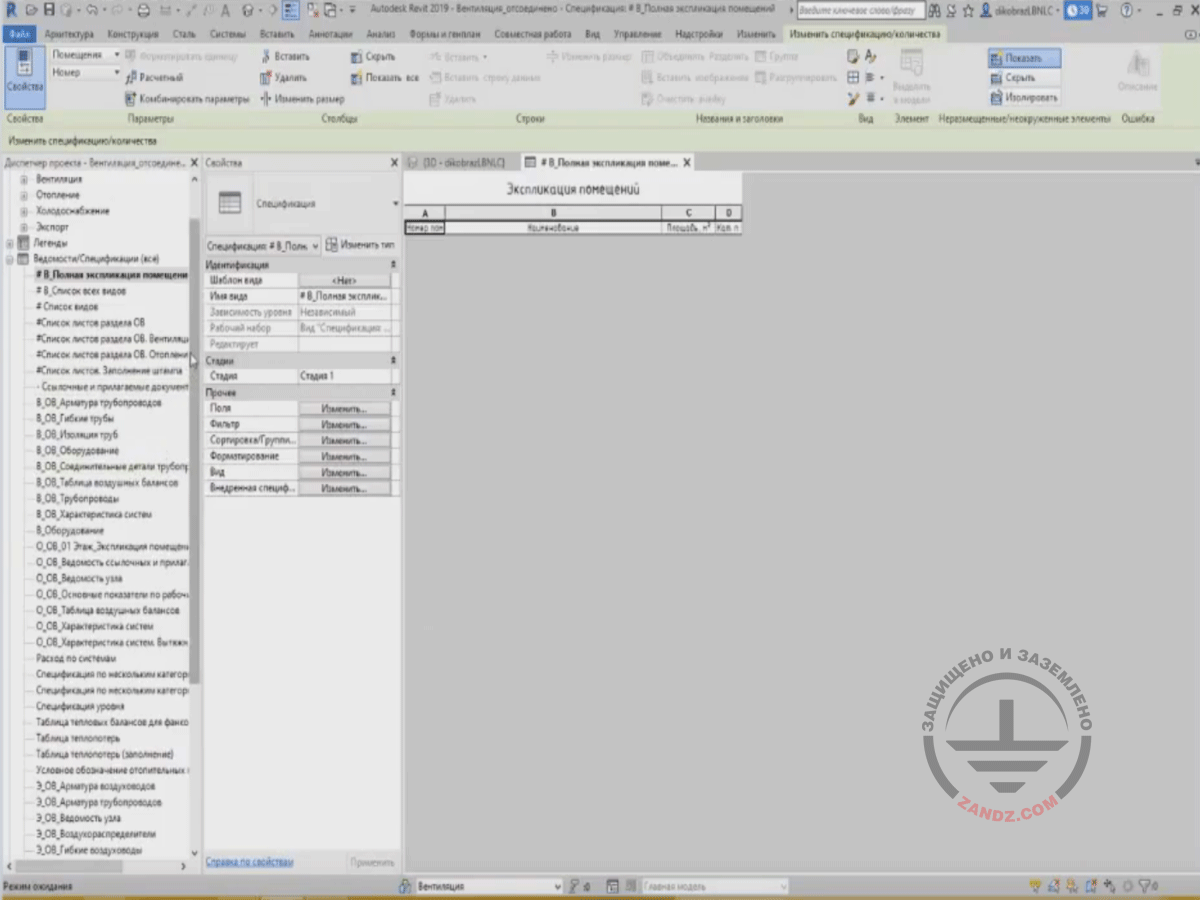
By double-clicking, we will go to the room specifications. We do not have any rooms here; therefore, the specification is empty. This way the specification will look like if there are not elements in the project. The specification can be created, but it will be empty. It will have a header with the name and the column names. That's it.
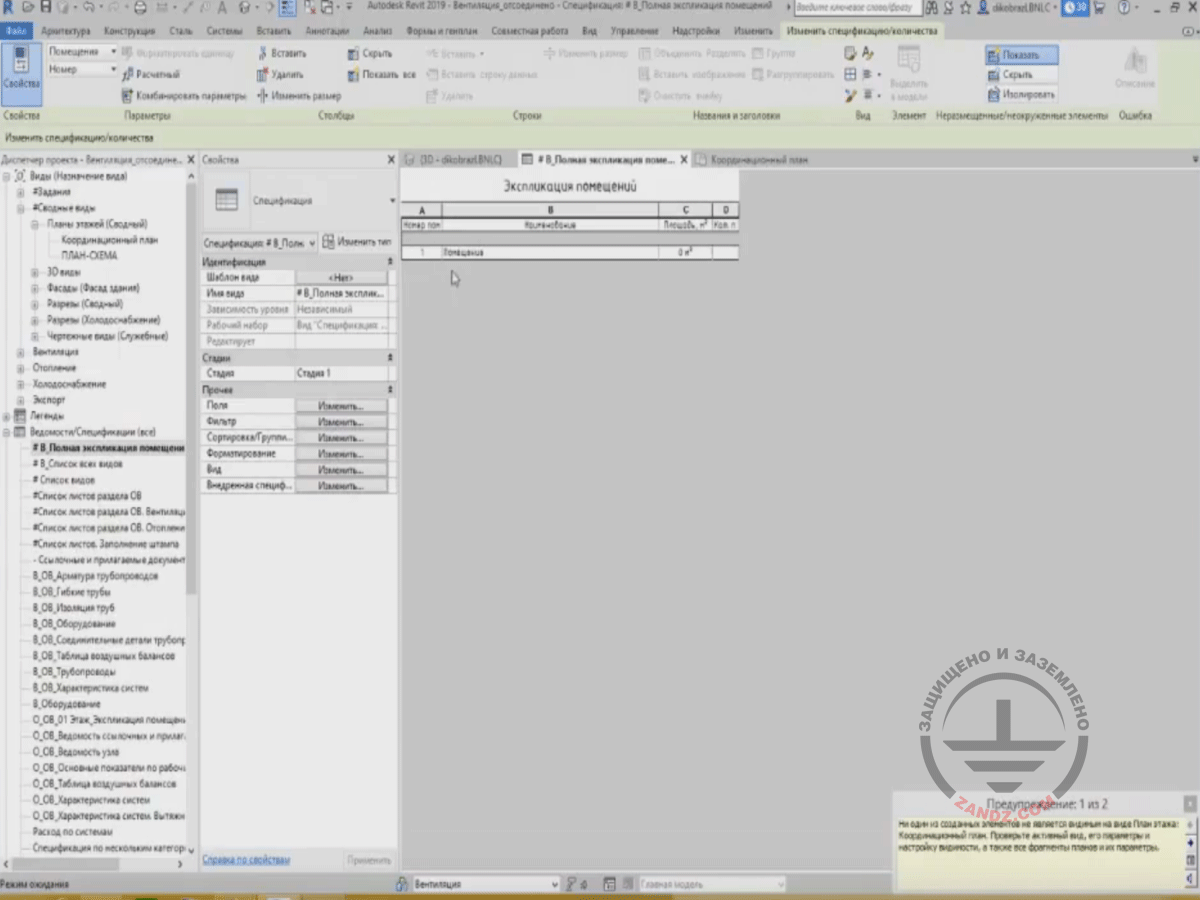
Room specifications
When elements appear in the project, the specification will be populated automatically. We will demonstrate it. I have no rooms now. And if I place a room, like this. As soon as I have placed an element in the project, it appears in the specification.
Demonstrating the specification filling-in process
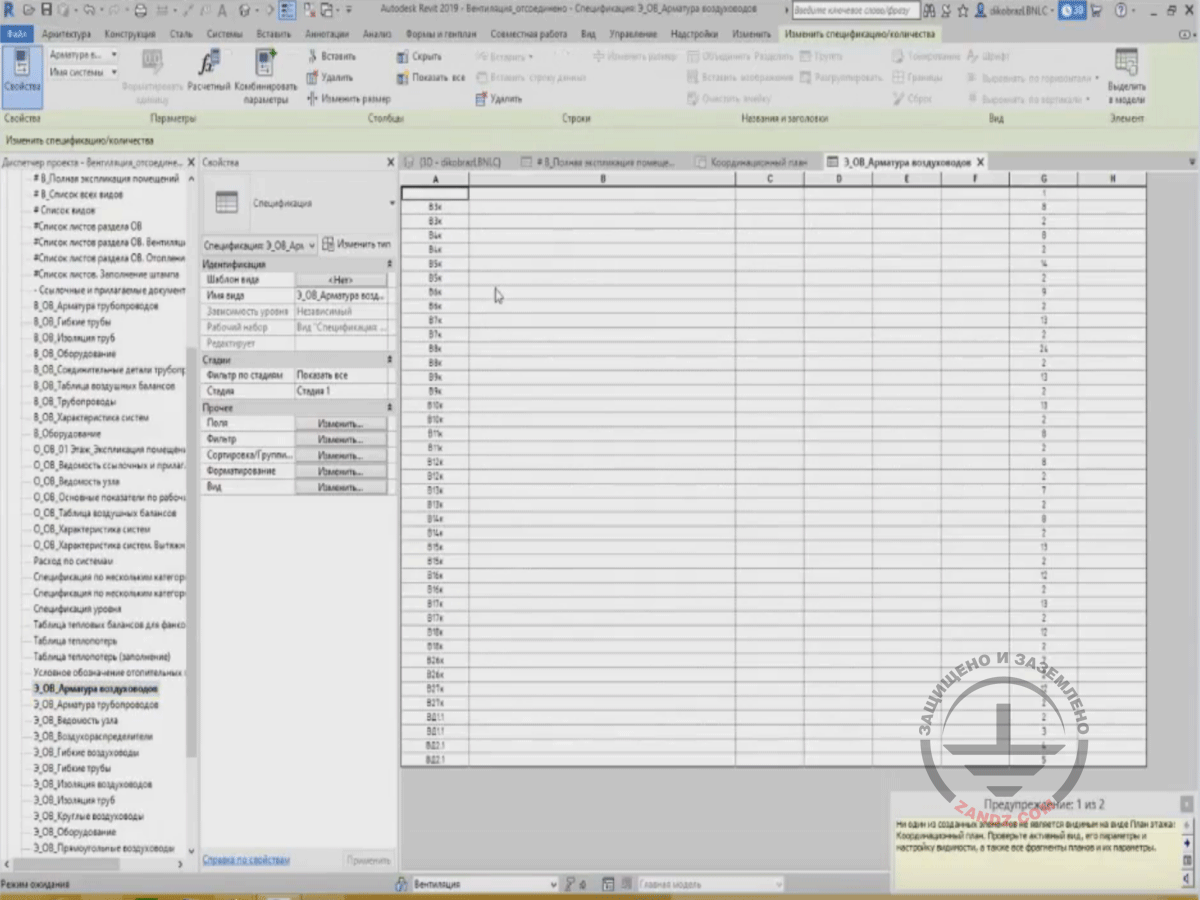
In addition to this, I have some ready-made Bills of Quantities with the filled-in elements. For example, it is the specification with the air duct fittings. There is a table that contains data specifying the element number. But it is not filled in yet. We will correct it now. We are going to create our own specification. Let's look at the process of its creation.
Creating a Specification
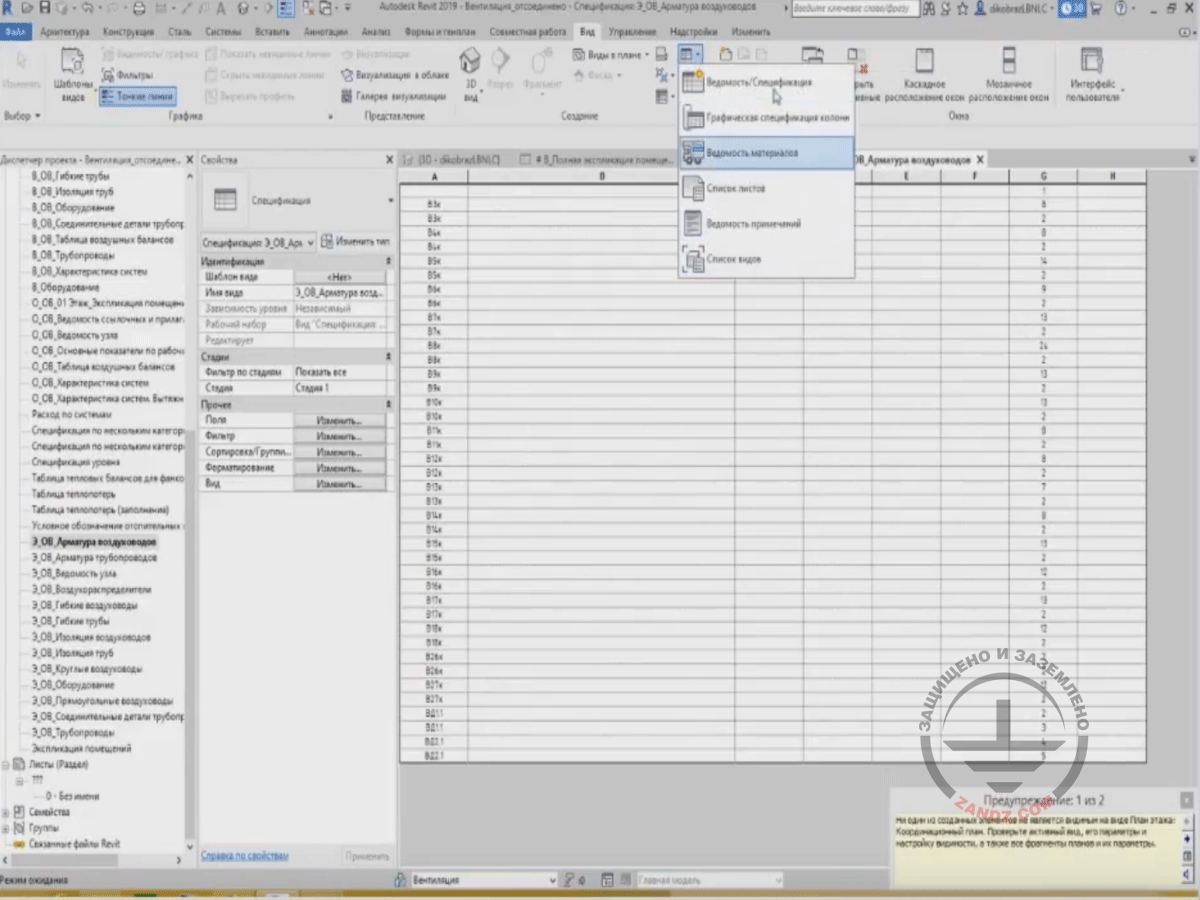
And let's go to the tab to create specifications. The specifications are created from the “View” tab, the icon looks like as a small table. Press here, and you will see the list of various Bills of Quantities and Specifications to create.
Demonstrating the "View" tab
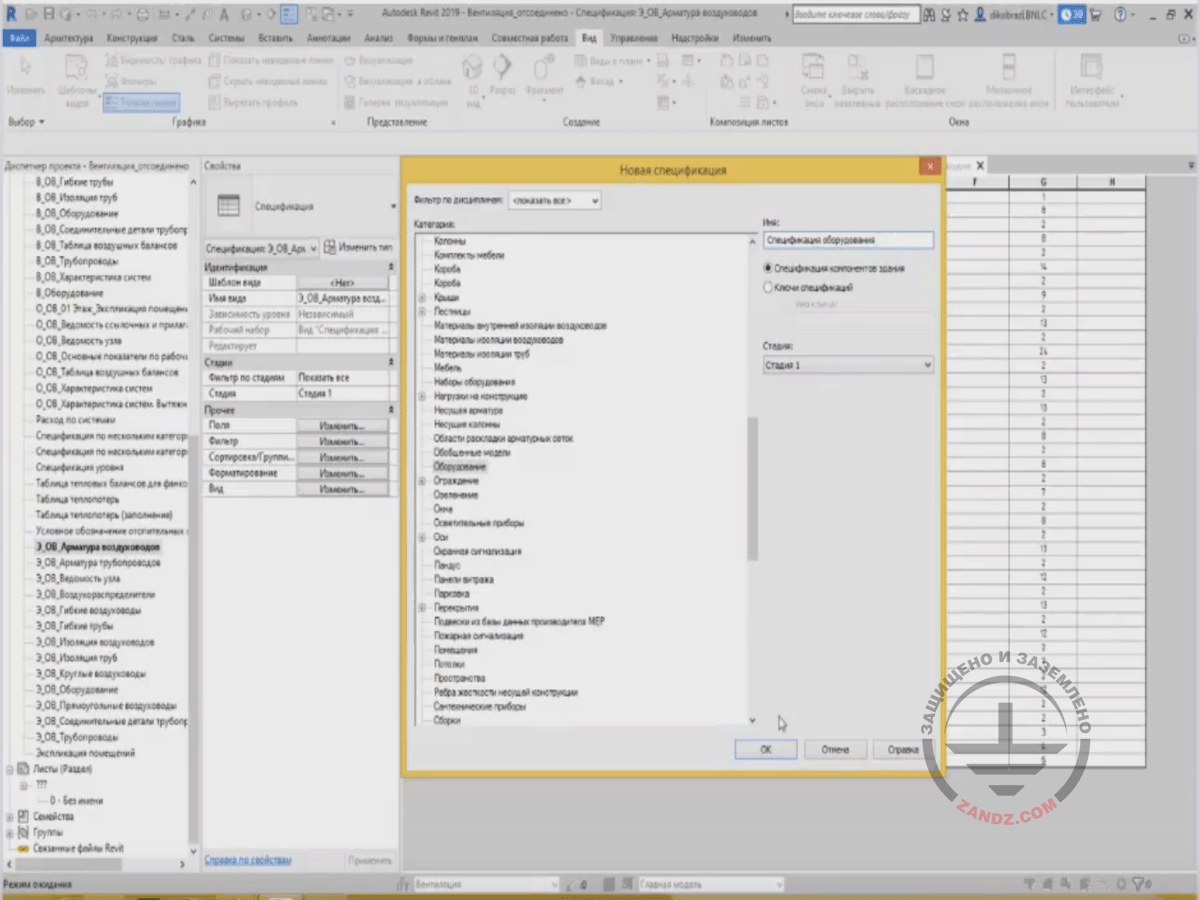
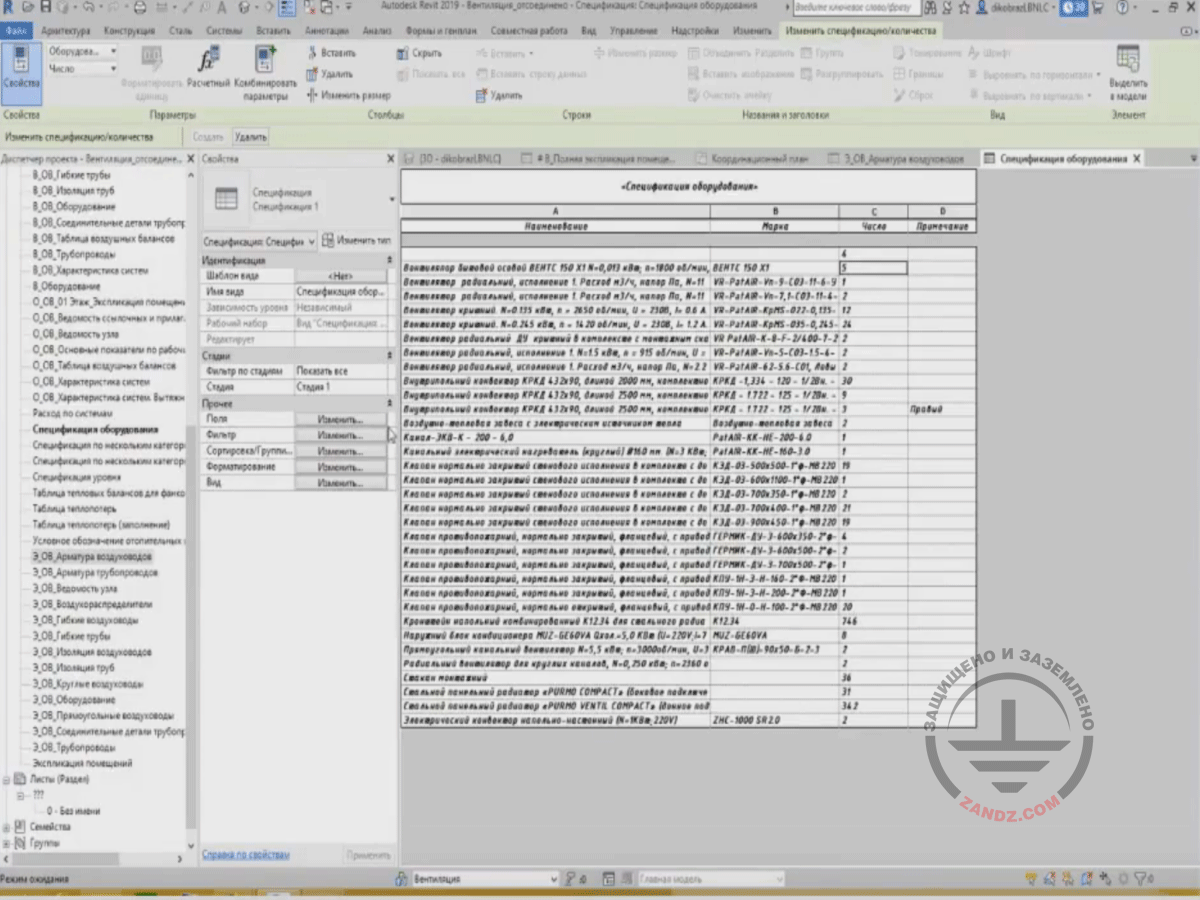
The main specification is the first value of “Bill of Quantities/Specification”. Press here to open the window. To create a specification, we need to choose a category in Revit, which will be placed into the table. Unfortunately, you cannot choose two categories, i.e. sometimes it is required to create a Bill of Quantities for both doors and windows at the same time or for some other elements like intermediate floors and walls. But unfortunately, you cannot choose two categories because Revit does not allow this. But you can choose a value for several categories. What does it mean: for several categories? These are all categories in Revit. Subsequently, you can just filter the unnecessary categories and leave the ones you need. Therefore, there are only two options: you either choose one particular category or choose all of them and then filter as necessary. Let's choose the “Equipment” category. We have “Equipment” in the project. Then, after you have chosen the category, enter the specification name. Let it be like it is, “Equipment Specification”, and press OK.
Demonstrating the “Equipment” category
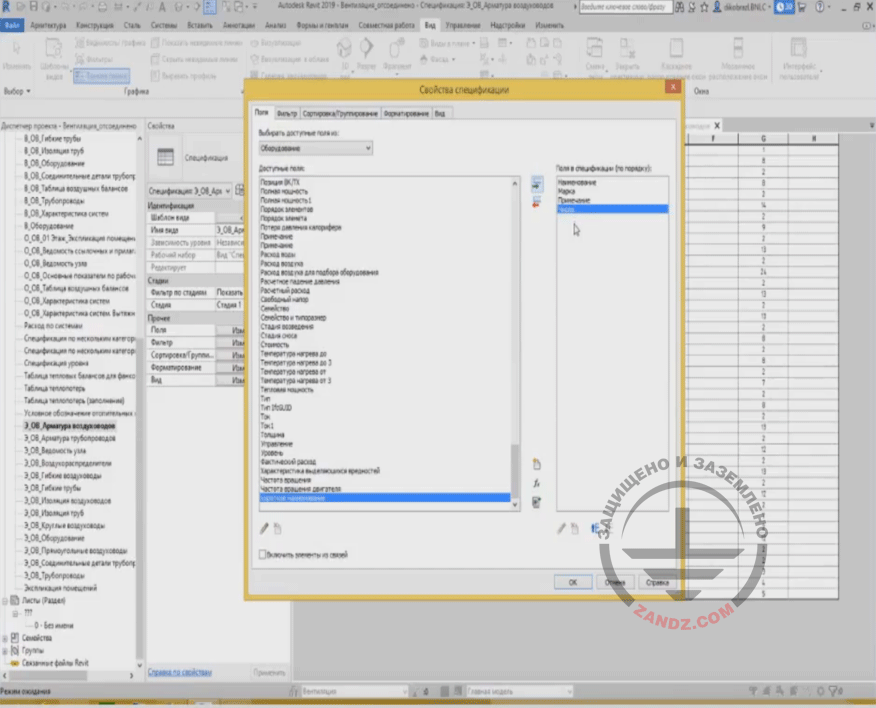
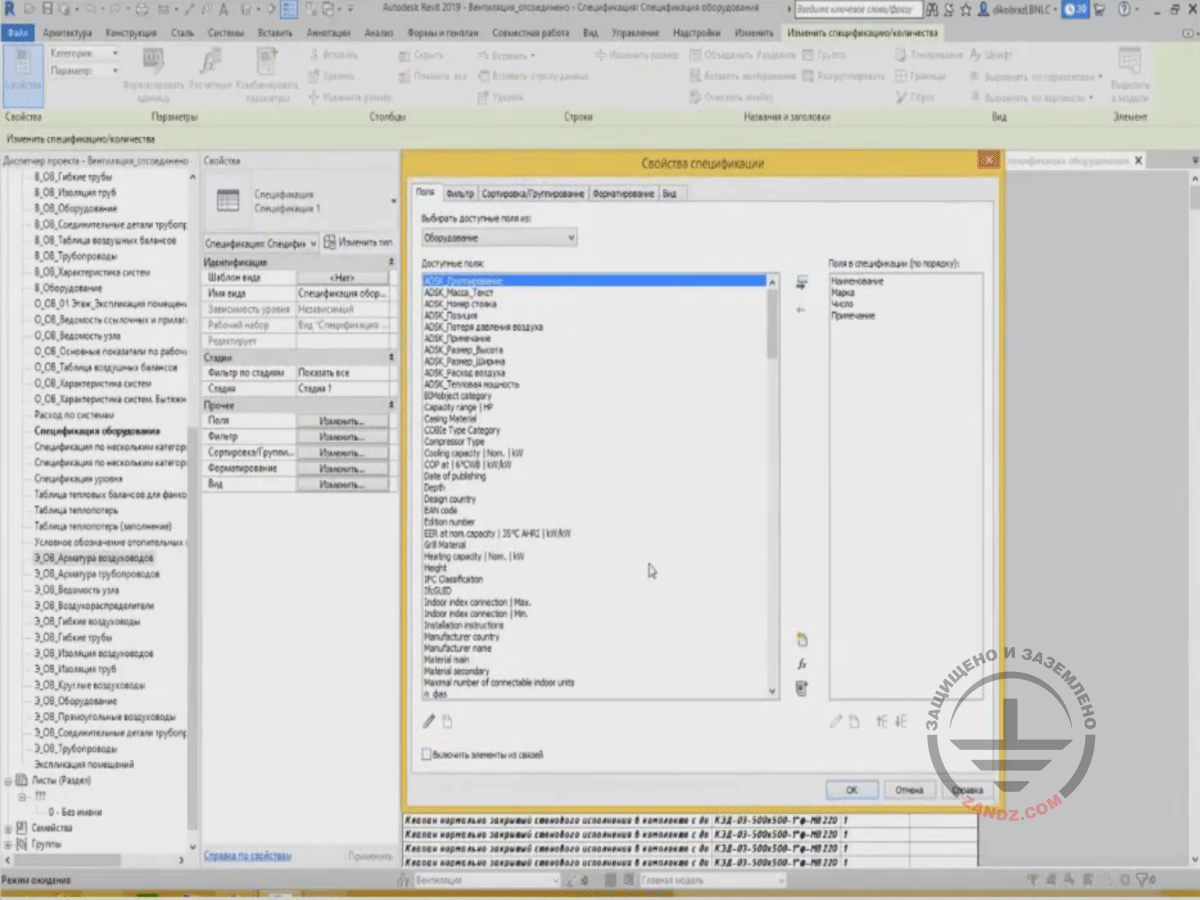
After pressing OK, you may go to the main window with the specification settings. What should we do first? The first is to add particular fields and columns into your specification. As I have already mentioned, the columns are the parameters of the certain categories. We can see on the top, what category is present; it is equipment. And then we can see “Available Fields”. What is it? These are all parameters in the project for the “Equipment” category. There are many various parameters. Let's choose some. For example, we choose “Name” or “Mark”. After “Name”, we can choose “Mark” for an element, “Notes” and, e.g., “Number”. Let's do it like this for now. We have chosen four specification fields that will be located in this table. Further, we will be able to change the location of certain fields, e.g., I would like to place “Notes” at the bottom. I highlight “Notes” and press down on arrow, and then press OK. We will not configure anything else for now.
Specification settings window
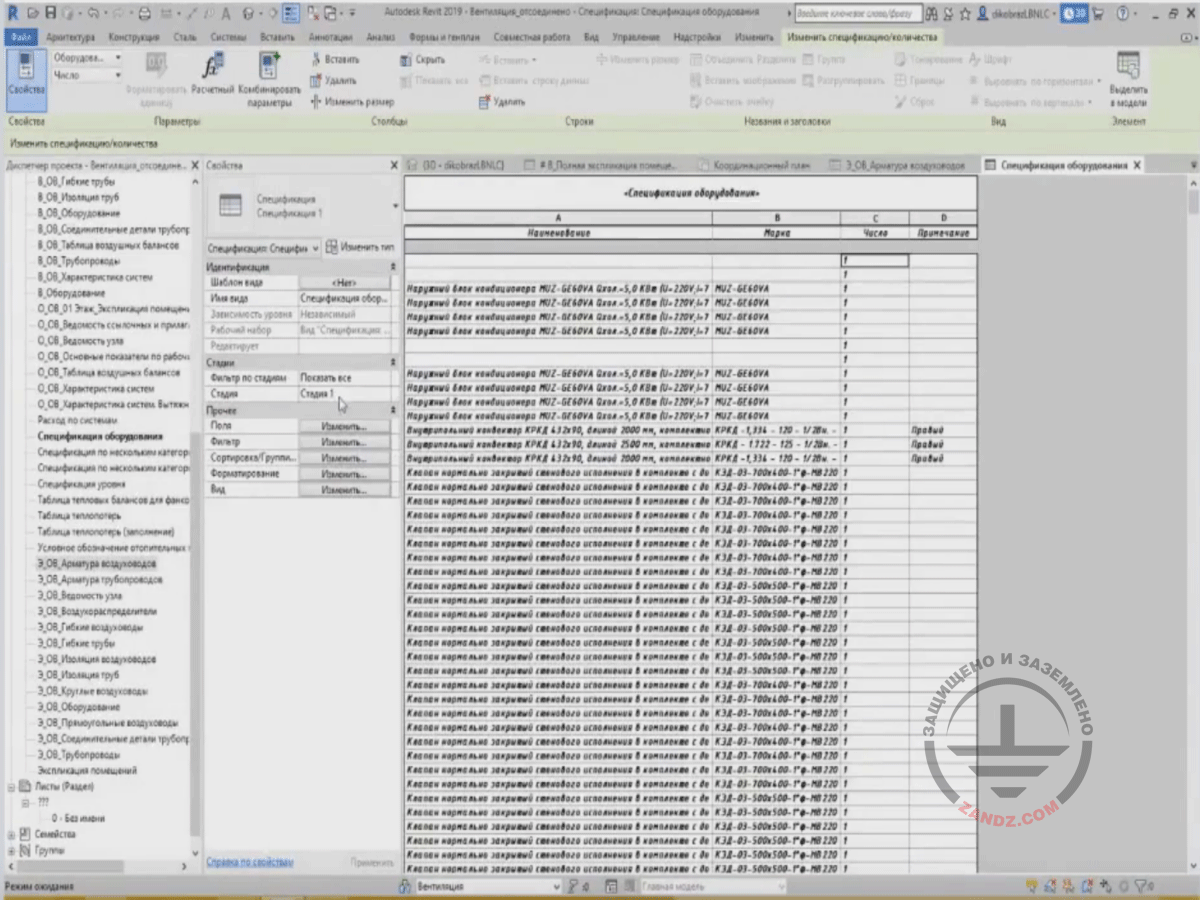
Press OK and see what happens. We have a large table now. There are many elements in it, more than one hundred. It shows “Name”, where conditioners, valves, etc. are located. It includes all the equipment contained in the project. And you can see that Revit has created a separate string for each element.
Demonstrating the equipment table
Let's see how it is done. To further move to the properties of the specification parameters, press any value of “Field”, “Filter”, “Sorting/Grouping”, “Formatting”, and “View” in the properties window. We have five “Change” buttons here. If you press any of them, the same window will open in different tabs.
Properties of the specification parameters
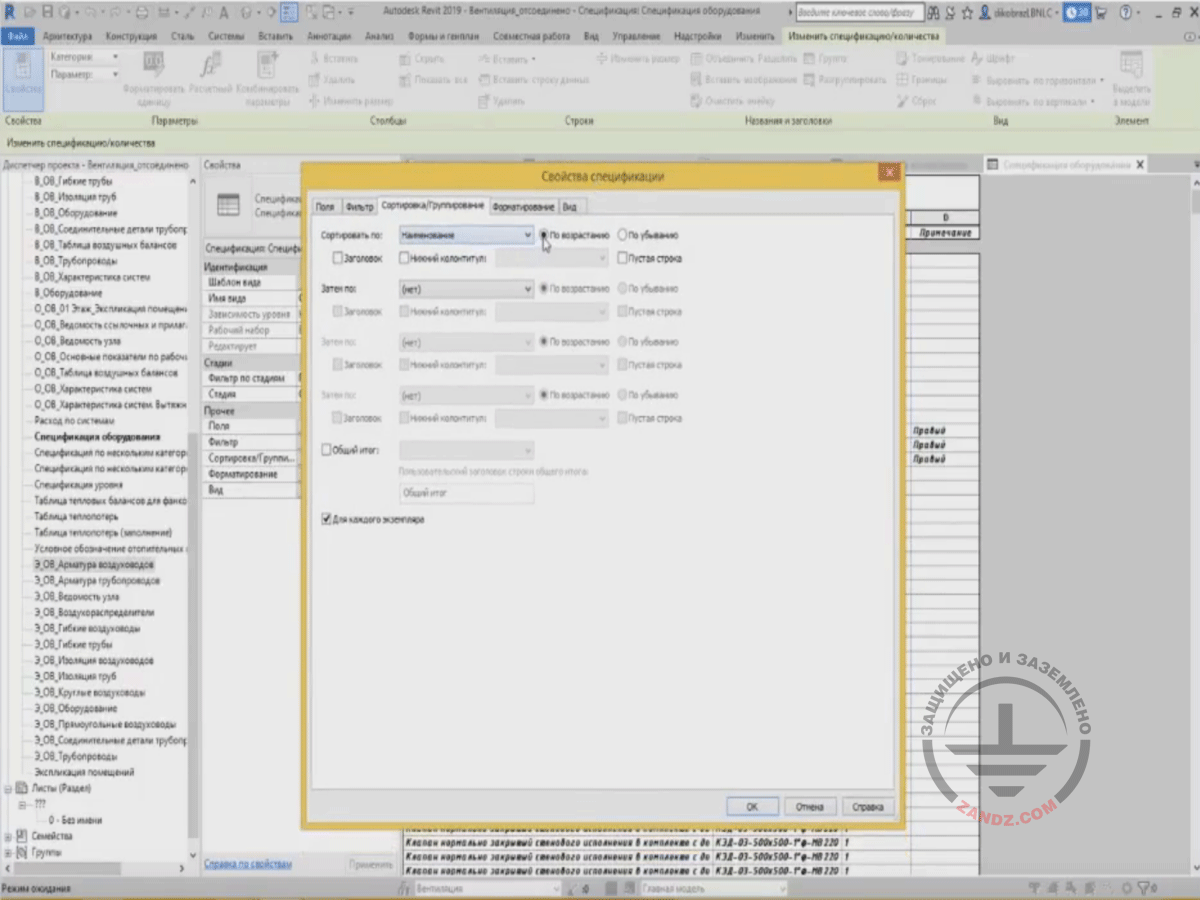
Let's now learn the “Sorting/Grouping” tab. We have no “Sorting/Grouping” now, that is why it is so large. What can we do to sort the table and make it more space-saving? We can choose a certain parameter and sort by it. Now, we have four different parameters in the fields, and I can choose any of them for sorting. We can choose from the “Name” list. Here, I am choosing the ascending or descending order of sorting. What will we have? Let's press.
Sorting demonstration
And now the table has been sorted by name starting with the alphabet letters and ending with “e”, i.e. “Electrical convector”. But there is more. Then, we need to group this table after sorting so that to make it more space-saving. To group the table, you have to untick “For Each Instance”. The parameter “For Each Instance” creates a separate string for each element in Revit. If you untick it, then the sheet will be grouped by the name parameter. All elements having the same name will be placed in a single string. You can clearly see that “Household Axial Fan VENTS” comprises five strings, and if I press OK with these settings, you can see that these five items have turned into one, and I have five of them in number. So, for other items I can directly count the element numbers.
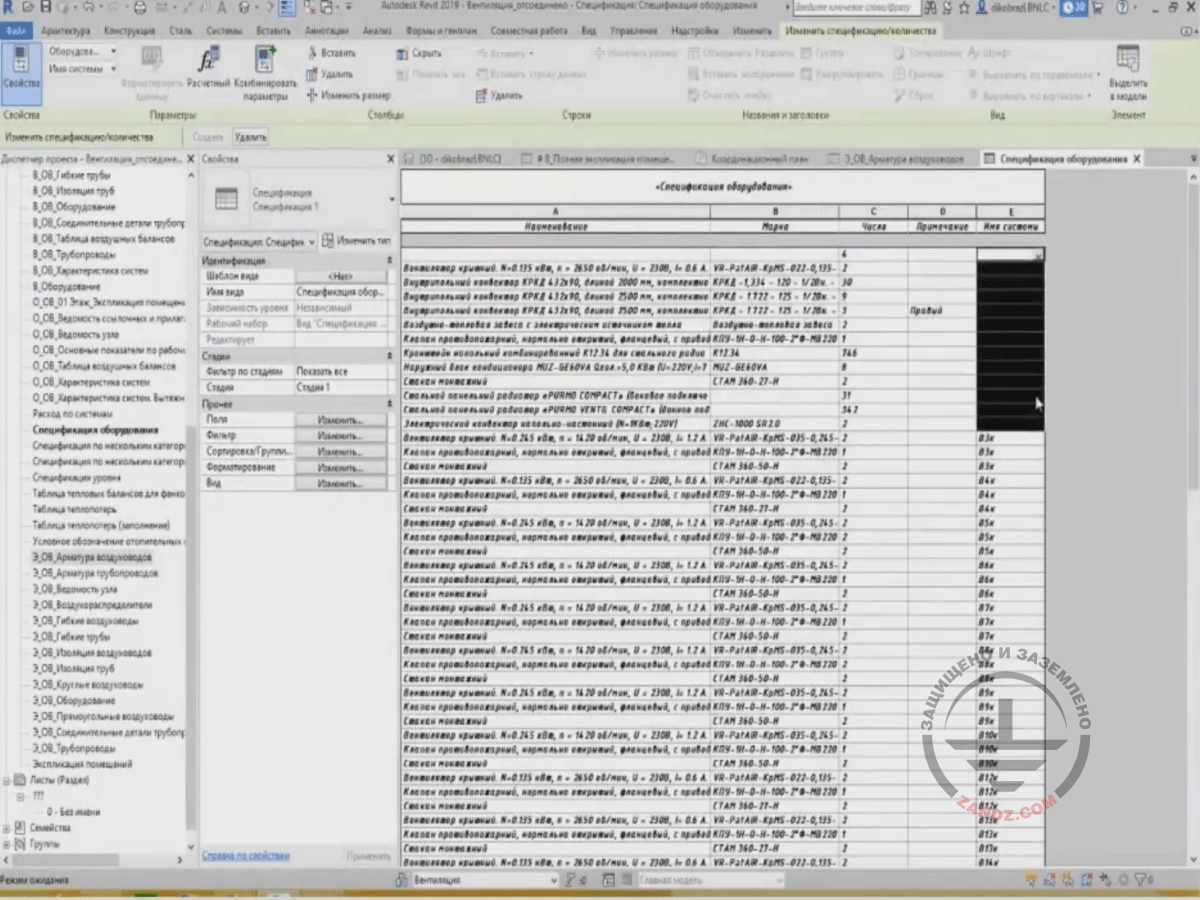
Demonstrating the table grouping
Next page >>
slides from 17 to 32
Related Articles:
