Webinar text. Page 2
Fast navigation by slides:
1. Why do we need more than protection zones?
2. Choosing lightning arresters
3. Transition to multi-electrode protection systems
4. Regulatory base
5. "Group" action of lightning arresters
6. Multi-wire lightning protection
7. What problems do protection zones for lightning arresters entail?
8. How to define zone dimensions?
9. Probabilistic technique, ENIN modification
10. Determining the lightning strike of the lightning channel
11. Technique background
12. Formulas
13. 3 calculation parameters of the technique
14. Software for calculating reliability
15. How to access the calculation service?
Page 2:
16. What examples will be considered?
17. Drawing editor
18. Screen demonstration
19. nformation on calculation service
20. Object description
21. Square object
22. Entering accurate dimensions
23. Object coordinates
24. Shape sizing
25. Drawing lines
26. Mast coordinates
27. Demonstrating the "Lightning Protection Density" window
28. Calculations
29. Calculated by
30. Saving a report
31. Brief system composition
32. Calculation result
33. References to regulatory documents
34. Demonstrating the "Calculation List" window
35. Previous calculation results
36. Removing unwanted elements
37. Saving a drawing
38. Calculation list. Displaying results
39. Calculation list. Calculated by
40. Results of calculation for a mall
41. Results of calculation for a multi-apartment house
42. Thank you!
43. Weak points in the statistical technique
44. Questions and answers
45. Features of the statistical technique
46. Thank you!
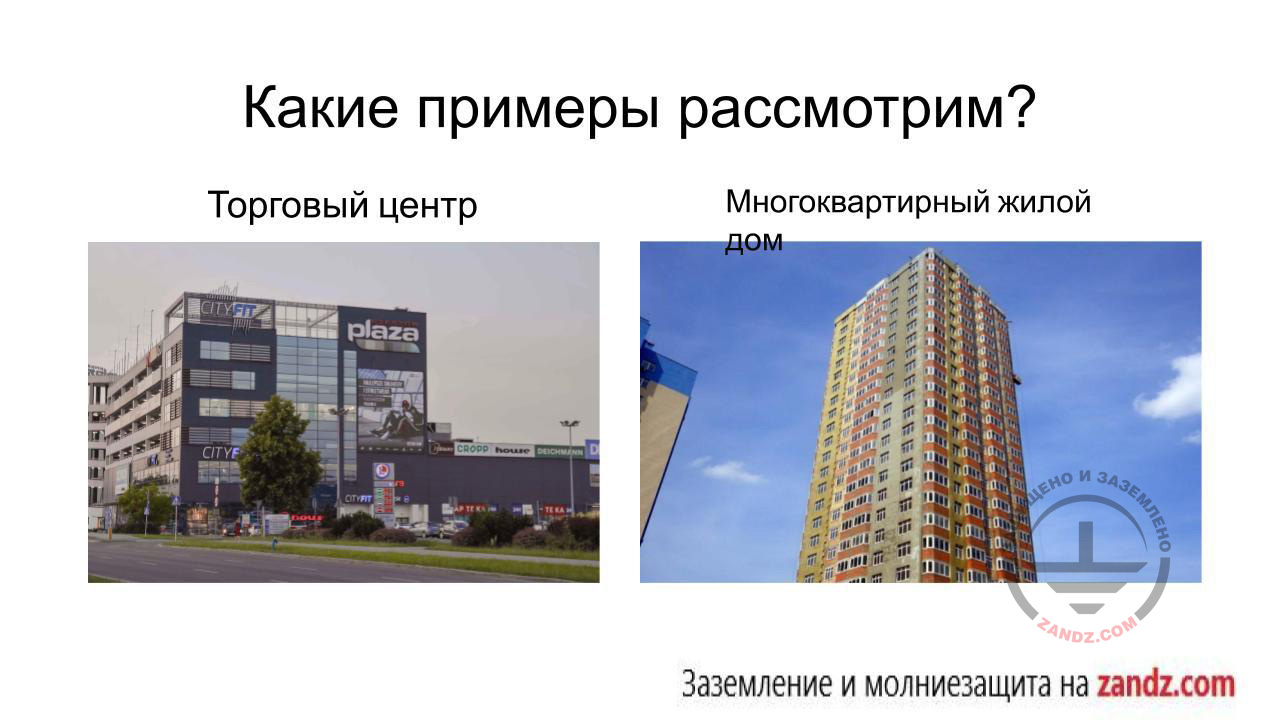
What examples will be provided?
Торговый центр - Mall
Многоквартирный дом - Multi-apartment building
Заземление и молниезащита на zandz.com - Earthing and lightning protection at zandz.com
Let's go further. What examples will be provided? We will consider two examples, in particular, a mall. We will take a minor mall with the dimensions 40 x 40 meters and the height 10 meters. We will perform a calculation using lightning arresters of two meters high and perform a calculation using lightning arresters of four meters high. And the second object will be a multi-apartment residential house that will be protected using the masts of 4 and 8 meters high. Thus, the house will have the dimensions 18 x 50 meters, and the height will be 20 meters, i.e. we will double the height compared to the mall.
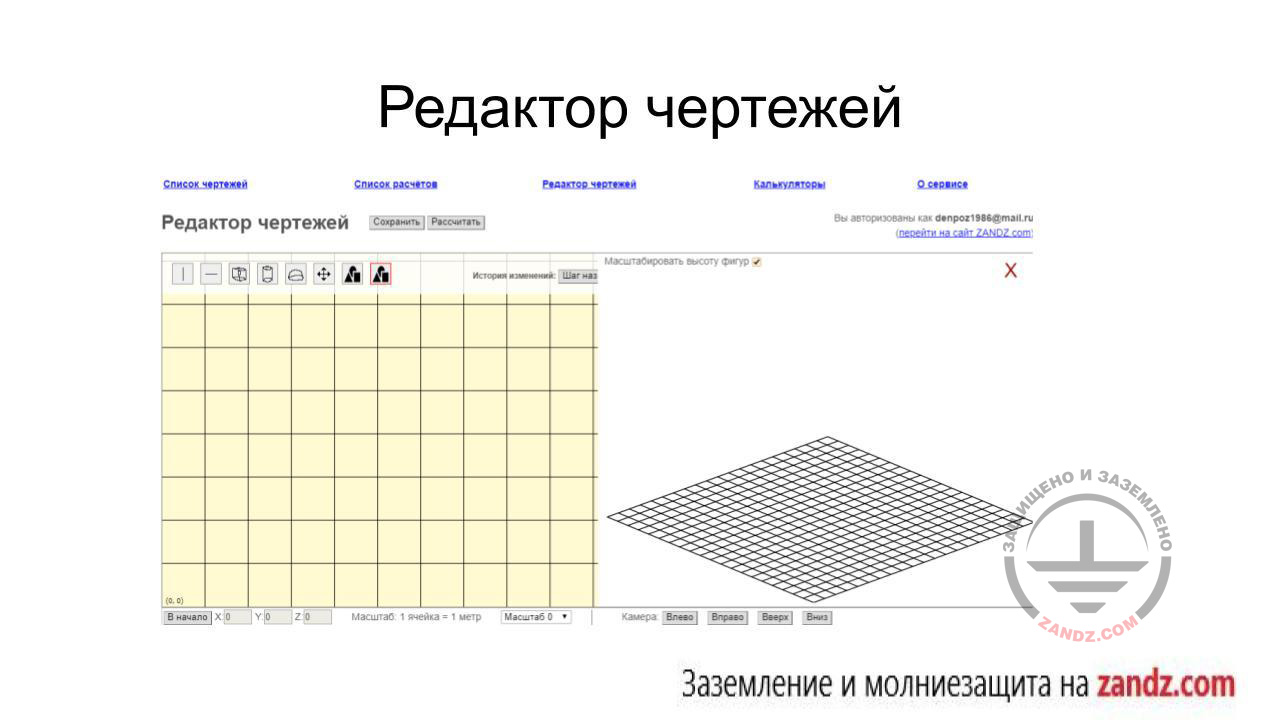
Drawing editor
Редактор чертежей - Drawing editor
Заземление и молниезащита на zandz.com - Earthing and lightning protection at zandz.com

Screen demonstration
Now, I am going to demonstrate a screen. I have already logged in there, so the workspace opens up immediately. Anatoly will probably send, to the chat, the links to the previous webinars where we have already discussed the calculation service in more details. We have considered each item, each element, i.e. we have studied this in details and discussed all of these parameters. If we study this briefly, in the upper part, there are references to the pages such as "Drawing Editor" representing the drawings that have been saved irrespective of the fact whether they were calculated or not. It means that all objects that were entered into the workspace in the drawing editor are saved here. There is also "Calculation List"; we will return to it later. This is a list of calculated objects. We are in the "Drawing Editor" now. Moreover, there are "Calculators", i.e. a new additional function for the calculation service. We are not going to discuss them today. We will have a distinct event for them, i.e. these will be either videos or a separate webinar. It means that as soon as we know the date, we will notify all of you. And there is also the page "About" (former "News").
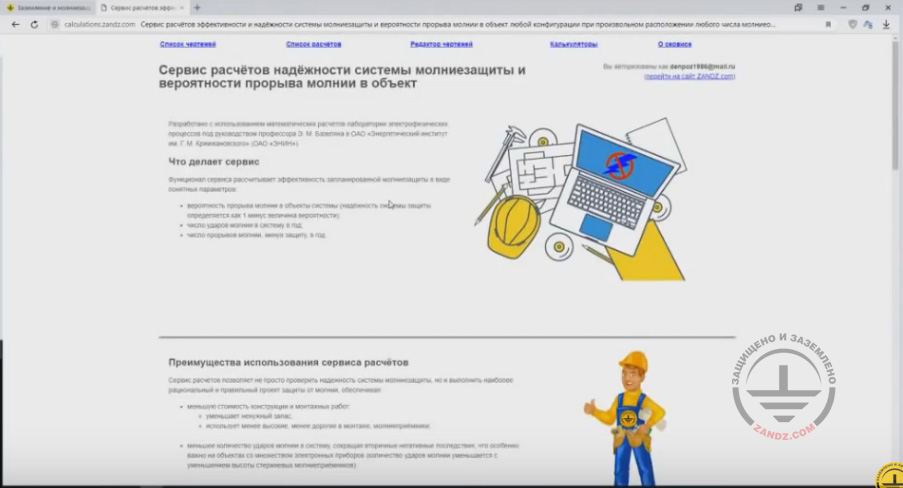
Information on calculation service
Here, the entire information on calculation service is provided. There are examples and videos, reviews, navigations describing how to create a drawing, how to make it, and there is also a reference to the webinar that has been held, i.e. you can see here readily, what and how is used.
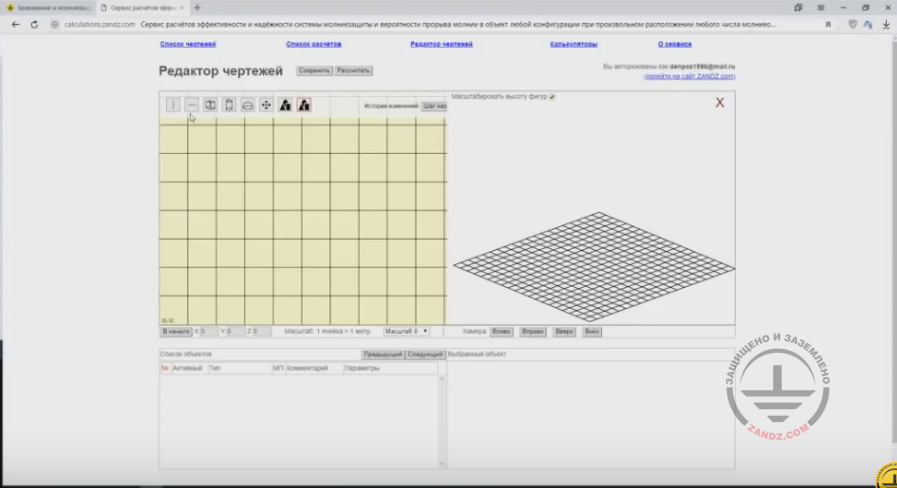
Object description
We will get back to the "Drawing Editor" and try to describe our object, in particular, a mall. As it was mentioned by Eduard Meerovich, there are several tools, in particular, vertical lines, horizontal lines, which can be either straight or curved. Let's suppose that if we use a line as a ground wire, then we can set a slack for this wire. Moreover, we have a 3D box, i.e. we can either place a rectangular object or a square object. In addition, there is a cylinder, a semi-sphere; these are among the main objects we use. Our mall is a facility with 40 x 40 meters and height 10 meters. Thus, we have a 2D workspace, and we also have a 3D output showing how the object will look like. Here, we have a zoom in/out tool; we can either zoom in or zoom out our workspace. This is required to perform calculation of either a small or a large object to see it clearly.
Square object
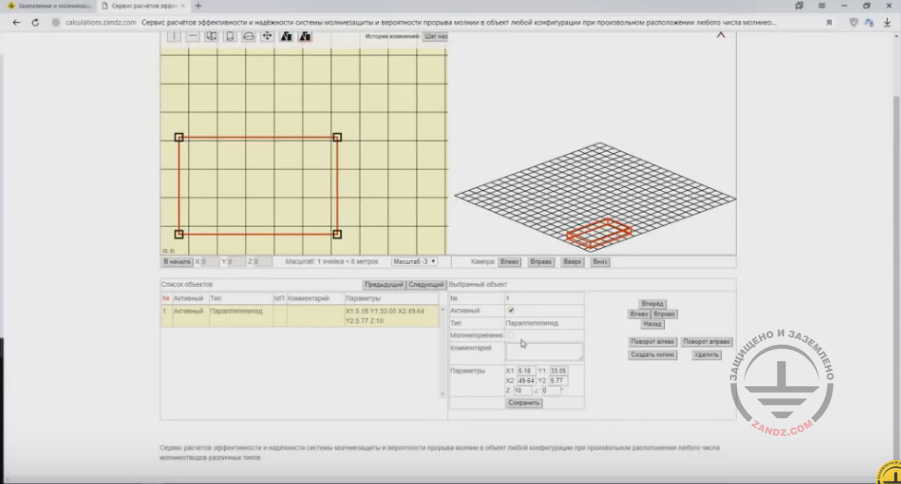
Entering accurate dimensions
To enter its accurate dimensions a little bit under the workspace, we have an object list, i.e. this is what we add to the workspace. And there are also coordinates, parameters, which can be set for a particular object specified in the workspace. "Active" or "Inactive" functions, i.e. if it is "Active", the object is not considered during calculations. If we re-calculate something for the second or the third time, if something has changed, let's assume that an object has changed the architecture and we need to delete an element, then we can just make it "Inactive". "Type" is clear. This is what we choose and specify in the workspace. The "Lightning Arrester" feature. If there is no mark, then during the calculation of our system, the software takes this object as the one to be protected. If we put a mark, then the software will take it as a lightning arrester.
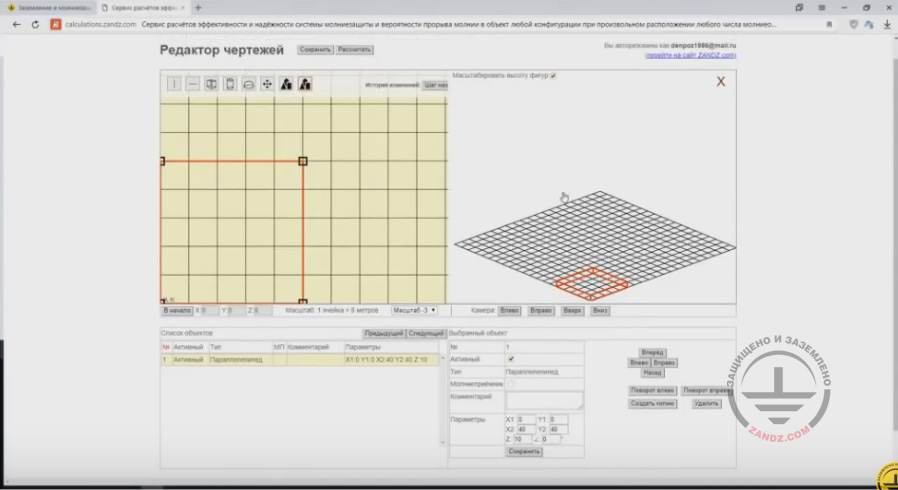
Object coordinates
There are also "Parameters", i.e. we can set the coordinates for the object, where the dimensions can also be set. Let's begin with coordinates and specify dimensions from point (0;0); we will have a dimension 40 in meters along axes X and Y, respectively. After that, we press "Save", and this is our object.
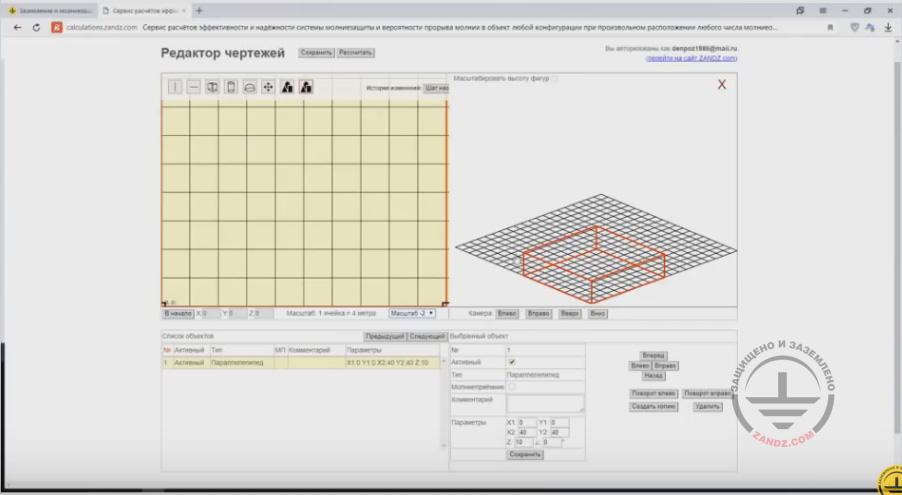
Shape zooming
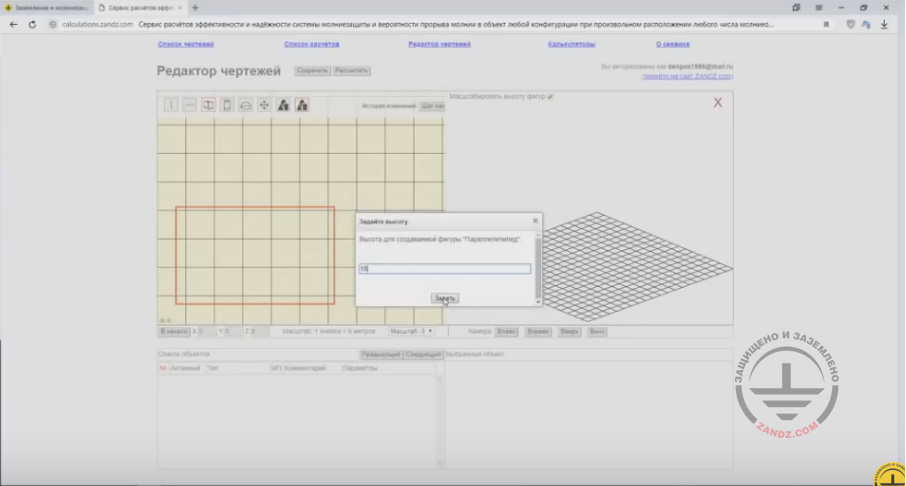
In the 3D workspace, we can see how it looks like. There is a "Shape Height Zooming"; if we untick the mark, it will be shown proportionally. If the object is seen small, we can zoom it in a little bit. So, it has become larger. Let's consider the first option, the protection of this object. We will not waste time on installing additional equipment, engines, chillers, etc., which are located on the roof. We will describe our object as a rectangle and install lightning arresters of 2 meters high along the perimeter.
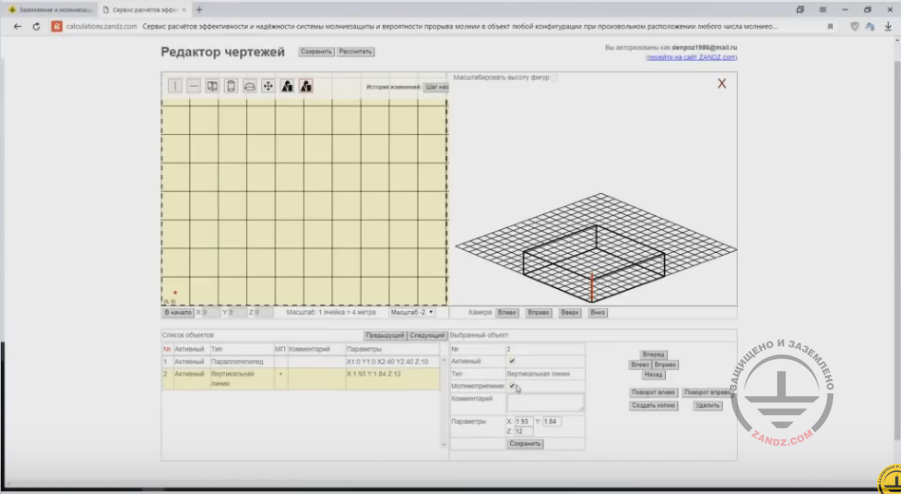
Drawing lines
To do this, we have to choose a vertical line and place it on the drawing. Thus, the object height is 10 meters, the lightning arrester is 2 meters high, i.e. we take the height of this line equal to 12 meters and press "Set".

Mast coordinates
Now, we have to set the coordinates, where this mast is to be installed. Let's place it at the distance of one meter from the roof edge, i.e. set coordinates X (1;1) and place these lightning arresters with the step of 9,5 meters along the object perimeter. To do this, to avoid drawing the vertical line each time, we can use the "Create a Copy" function. It is located to the right from coordinates, i.e. we press the "Create a Copy". A copy of a previous object appears automatically in the list, where we can simply change our coordinates. Let's start wit axis Y with the step of 9.5 meters. It will be 10.5 meters, and press "Save". Thus, we can create multiple lightning arresters along the perimeter, i.e. we can place them with the step of 9,5 meters. Now, we will install it and see what happens. When we will perform a calculation for higher lightning arresters, we can use a copy of this drawing so that do not enter the same information again. Therefore, we will use the copying tools. I will show you how to do that. Along the Y axis, we will do the same reduction. Let me remind you that our lightning arresters are located at the distance of one meter from the roof edge. That is it. We have added all elements into the workspace. We have represented the mall as a 3D box. We have installed two-meter masts along the perimeter. Then, we go directly to the drawing saving. To do this, we have a "Drawing Editor" label over the workspace. There are two options: "Save" and "Calculate". First of all, we have to save an object so that not to lose data; so we press "Save" then.
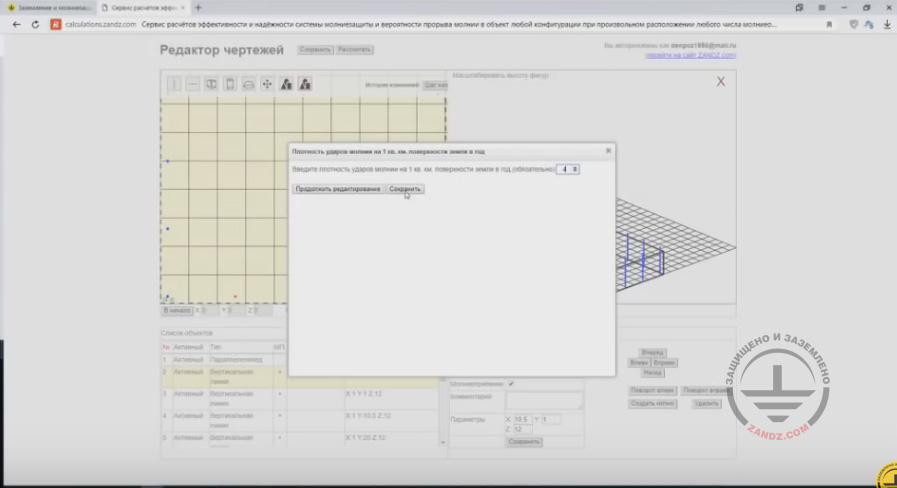
Demonstrating the "Lightning Strike Density" window
And the "Lightning Strike Density per 1 sq. km of the Ground Surface per Year" window appears, i.e. this parameter can be seen. It is present in RD 34; it is calculated on the basis of the region where the object is located. Let's assume that we take it for Moscow, and our value will be 4, and press "Save" after that. The drawing has been successfully saved. Now, the drawing has appeared in our drawing list.
Calculations
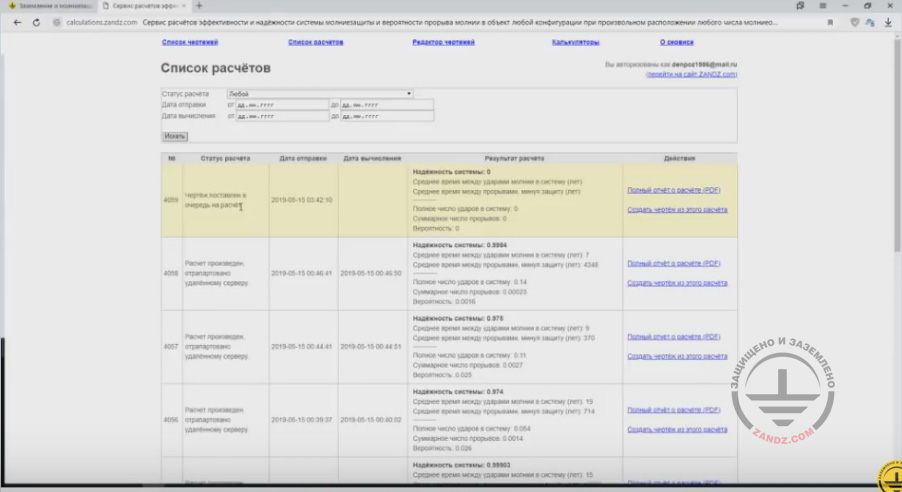
Next, we begin calculating. To do this, we press "Calculate". And here, another question is prompted regarding the strike density, so that we could double-check and, respectively, change it, if required. Press "Calculate". After pressing the button, we go to the "Calculation List", where all of our calculations are provided, including the ones made previously. We can see the calculation we are showing now, i.e. it was in the queue. The calculation takes not more than one or two minutes. We are going to update the page now. After the calculation, a full calculation will be available, wherein all coordinates for each object will be defined, which are entered into our system, as well as the calculation results will be shown, including the actual reliability for this object.
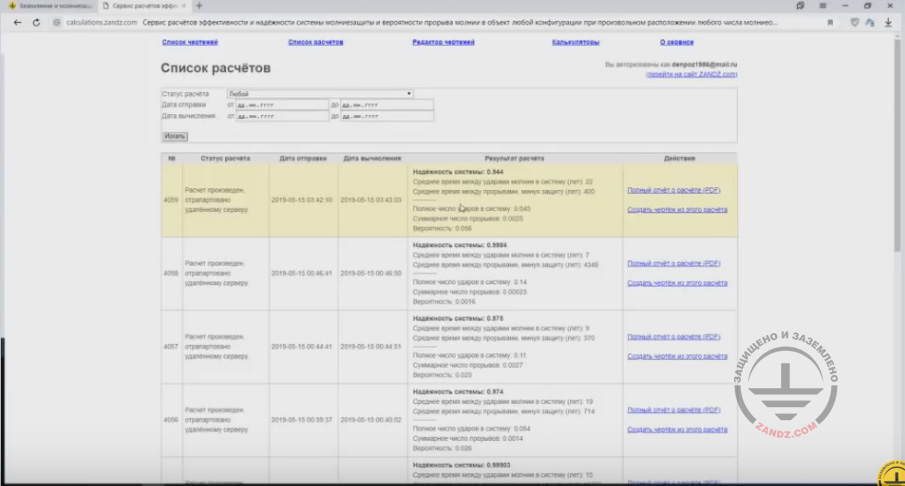
The calculation is done
Thus, the calculation is done. The calculation results are briefly provided here. The reliability is 0.944, which is a pretty high value. We can see an average time between the lightning strikes into the system, i.e. these are the lightning strikes to the system, including our lightning arresters and the protected object, i.e. to our system entirely. And we also have a parameter disclosed by Eduard Meerovich, i.e. the average time between the breakthroughs that have bypassed the lightning arrester. These are the lightnings that go to the object directly.
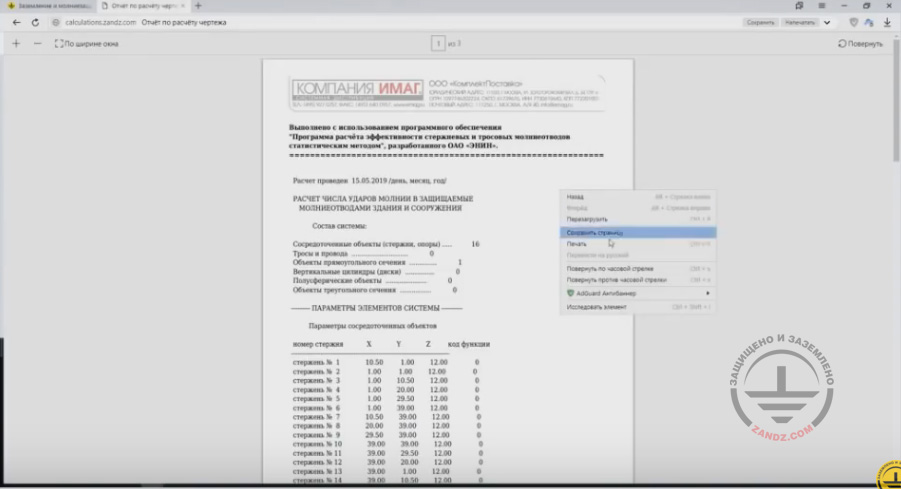
Report saving
You can save it in the PDF format. To do this, you have to right-click and press "Save a Page". This report will be saved.
<< Previous page
slides from 1 to 15
Next page >>
slides from 31 to 45 + Questions and answers
Related Articles:
 Lightning Protection of Large Territories: Parks, Grounds, Plant Territories. Page 1
 Lightning Protection of Large Territories: Parks, Grounds, Plant Territories. Page 2
 Lightning Protection of Large Territories: Parks, Grounds, Plant Territories. Page 3